
Storing large binary files (PDFs, images, compiled assets) in Git bloats the repository, slows down clones, and makes every checkout heavier. This guide walks through moving those binaries to AWS S3, serving them via CloudFront, and automating builds with GitHub Actions — so your binaries stay out of Git entirely.
Create an AWS S3 bucket
First, create a basic S3 bucket using the AWS console.
Leave “Block all public access” enabled — only CloudFront will access the bucket directly.
You do not have to enable bucket versioning as your source files are already in Git, but you can if you need to.
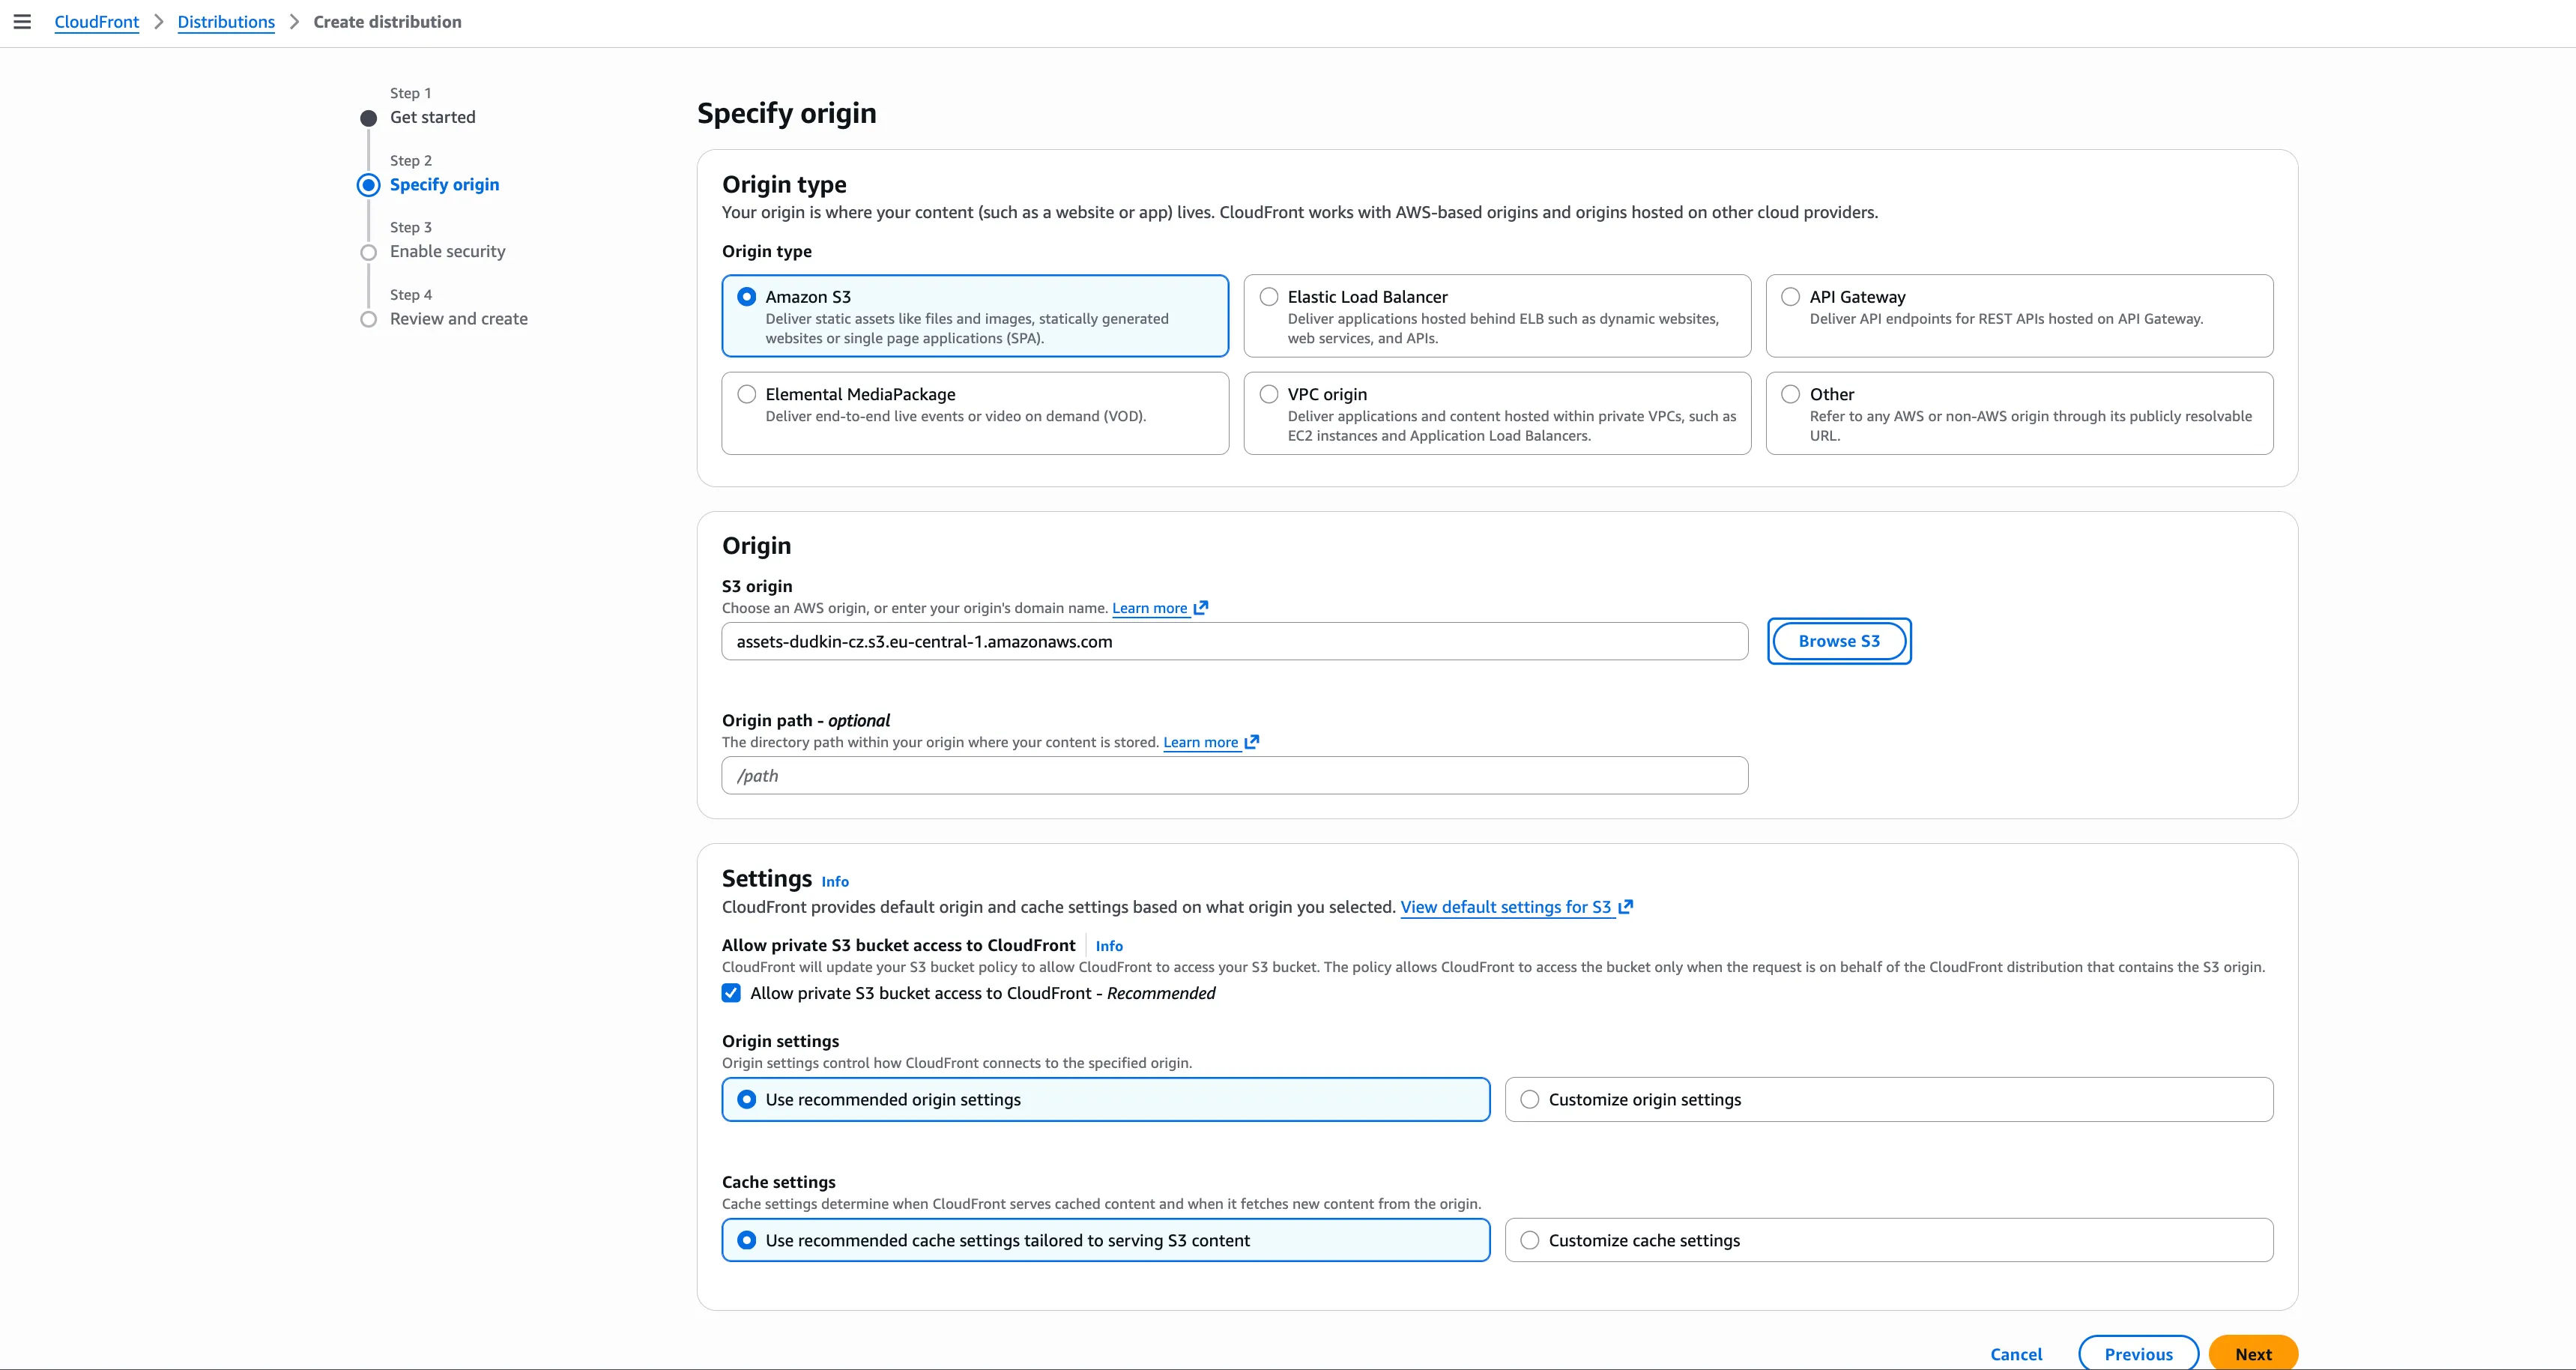
Create an AWS CloudFront distribution
-
Create a CloudFront distribution using the AWS console:

-
Allow access to your S3 bucket’s contents by setting an origin. When you select your S3 bucket as the origin, CloudFront will recommend using Origin Access Control (OAC) — accept this. OAC lets CloudFront read from the bucket while keeping “Block all public access” enabled. AWS will provide a bucket policy you can apply automatically, granting CloudFront the necessary read permissions.
-
Upload an image file
test.pnginside the bucket and check if you can access it by pastinghttps://your_distribution_domain_name/test.pnginto your web browser -
Note that you cannot access the same file via an S3 link because only CloudFront can retrieve the file (even if the CloudFront link itself makes your file publicly available).
-
If you have your own domain (does not have to be hosted on AWS), you can set it up with a CloudFront TLS certificate. Choose your CloudFront distribution, and click
Add domain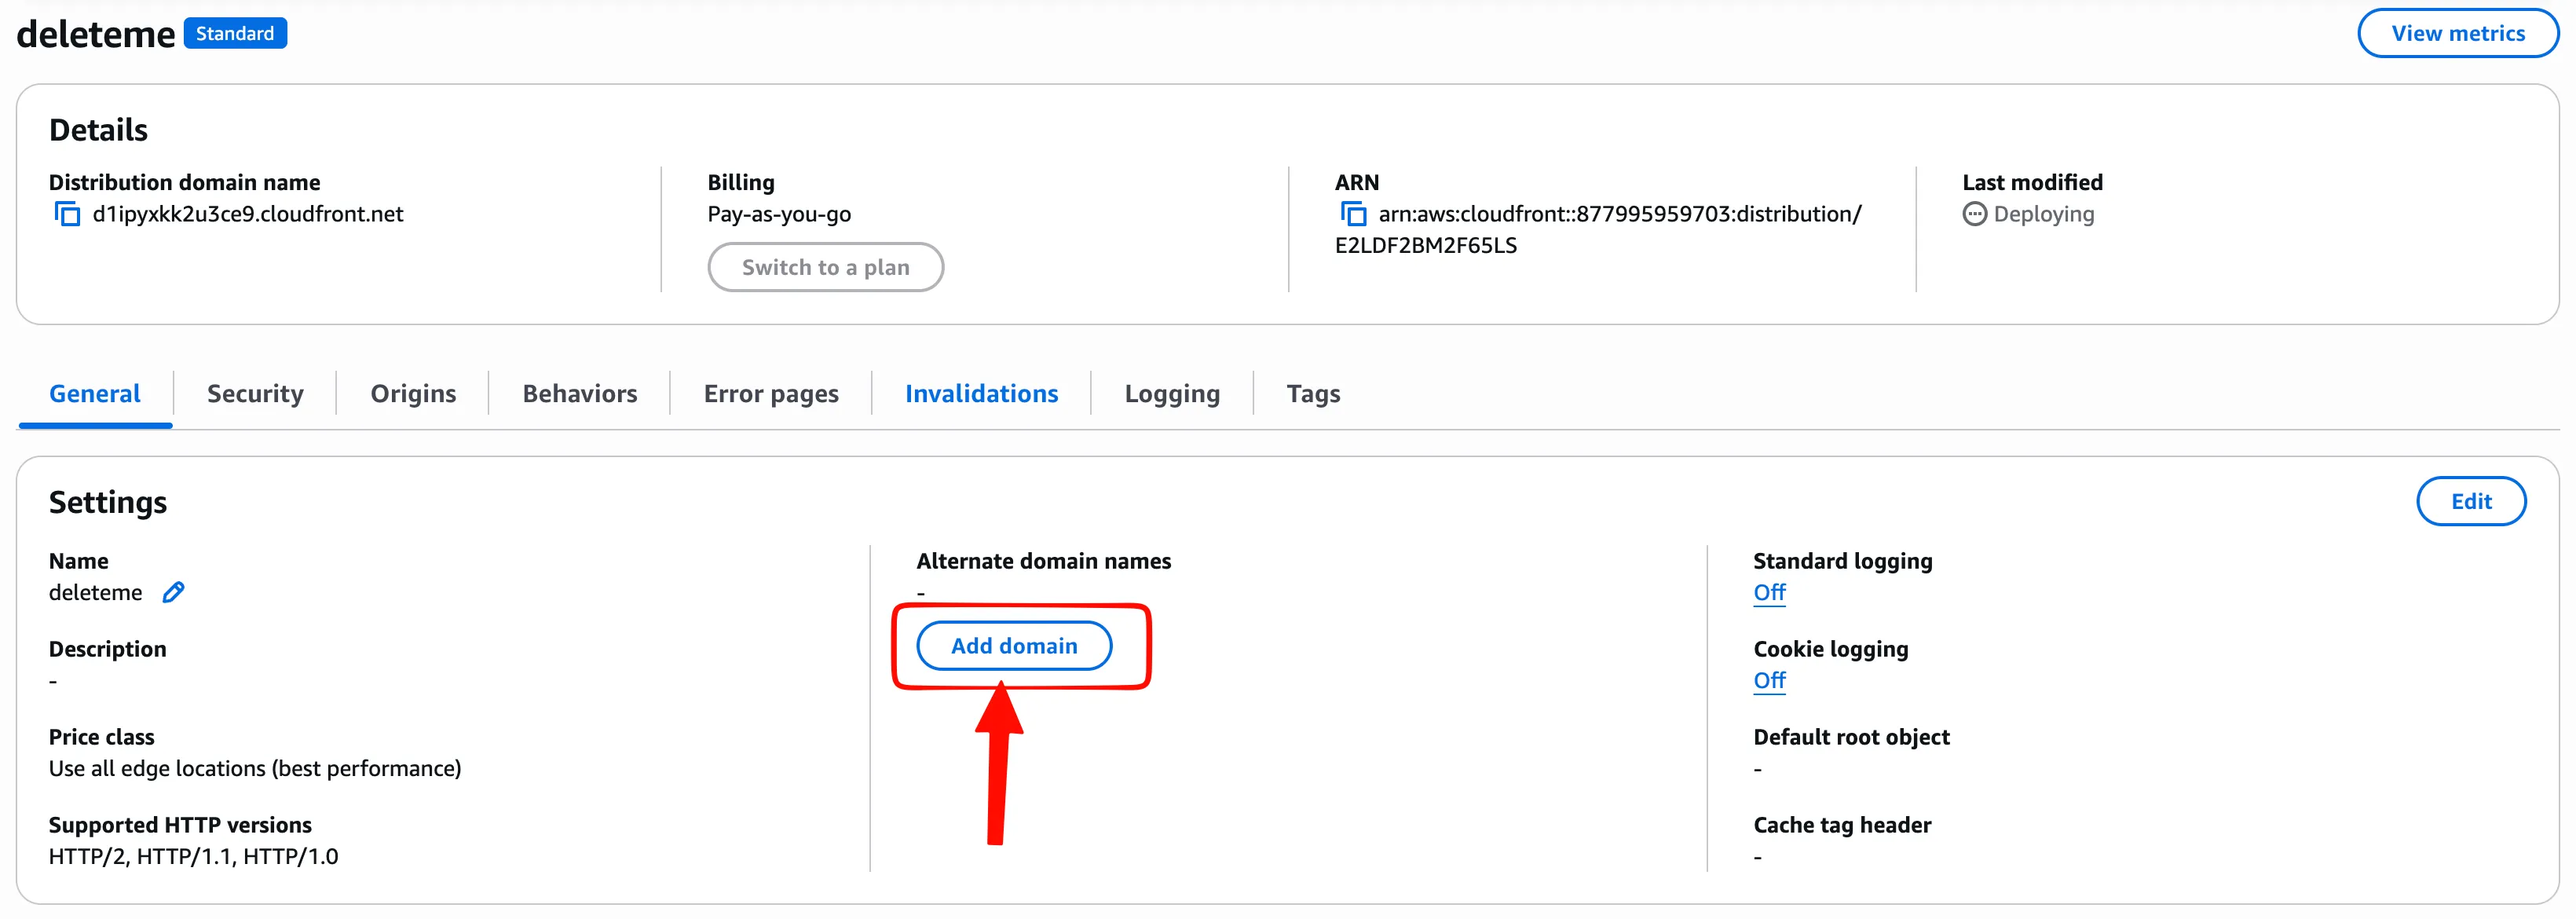 AWS will guide you on how to create a TLS certificate. Add the CNAME record at your DNS hosting provider and AWS will automatically deploy a TLS certificate.
You also need to create a CNAME that will be named after your custom domain (e.g. assets.example.com) and will point to your AWSDistribution domain name. -
If you can access your S3 bucket’s contents using a web browser via CloudFront link, you can already use your distribution link to point to binary files in your web application, effectively moving binaries out of your Git repository.
But this post goes further: it covers setting up GitHub Actions to build and push binaries to S3 automatically on every source file change.
Set up IAM role and OpenID Connect
- Create an IAM policy that will allow access to your S3 bucket

{
    "Version": "2012-10-17",
    "Statement": [
        {
            "Sid": "ListObjectsInBucket",
            "Effect": "Allow",
            "Action": ["s3:ListBucket"],
            "Resource": ["arn:aws:s3:::YOUR_BUCKET_NAME"]
        },
        {
            "Sid": "AllObjectActions",
            "Effect": "Allow",
            "Action": "s3:*Object",
            "Resource": ["arn:aws:s3:::YOUR_BUCKET_NAME/*"]
        }
    ]
}
Note:
s3:*Objectis broad. For production, consider restricting this tos3:PutObjectands3:GetObject.
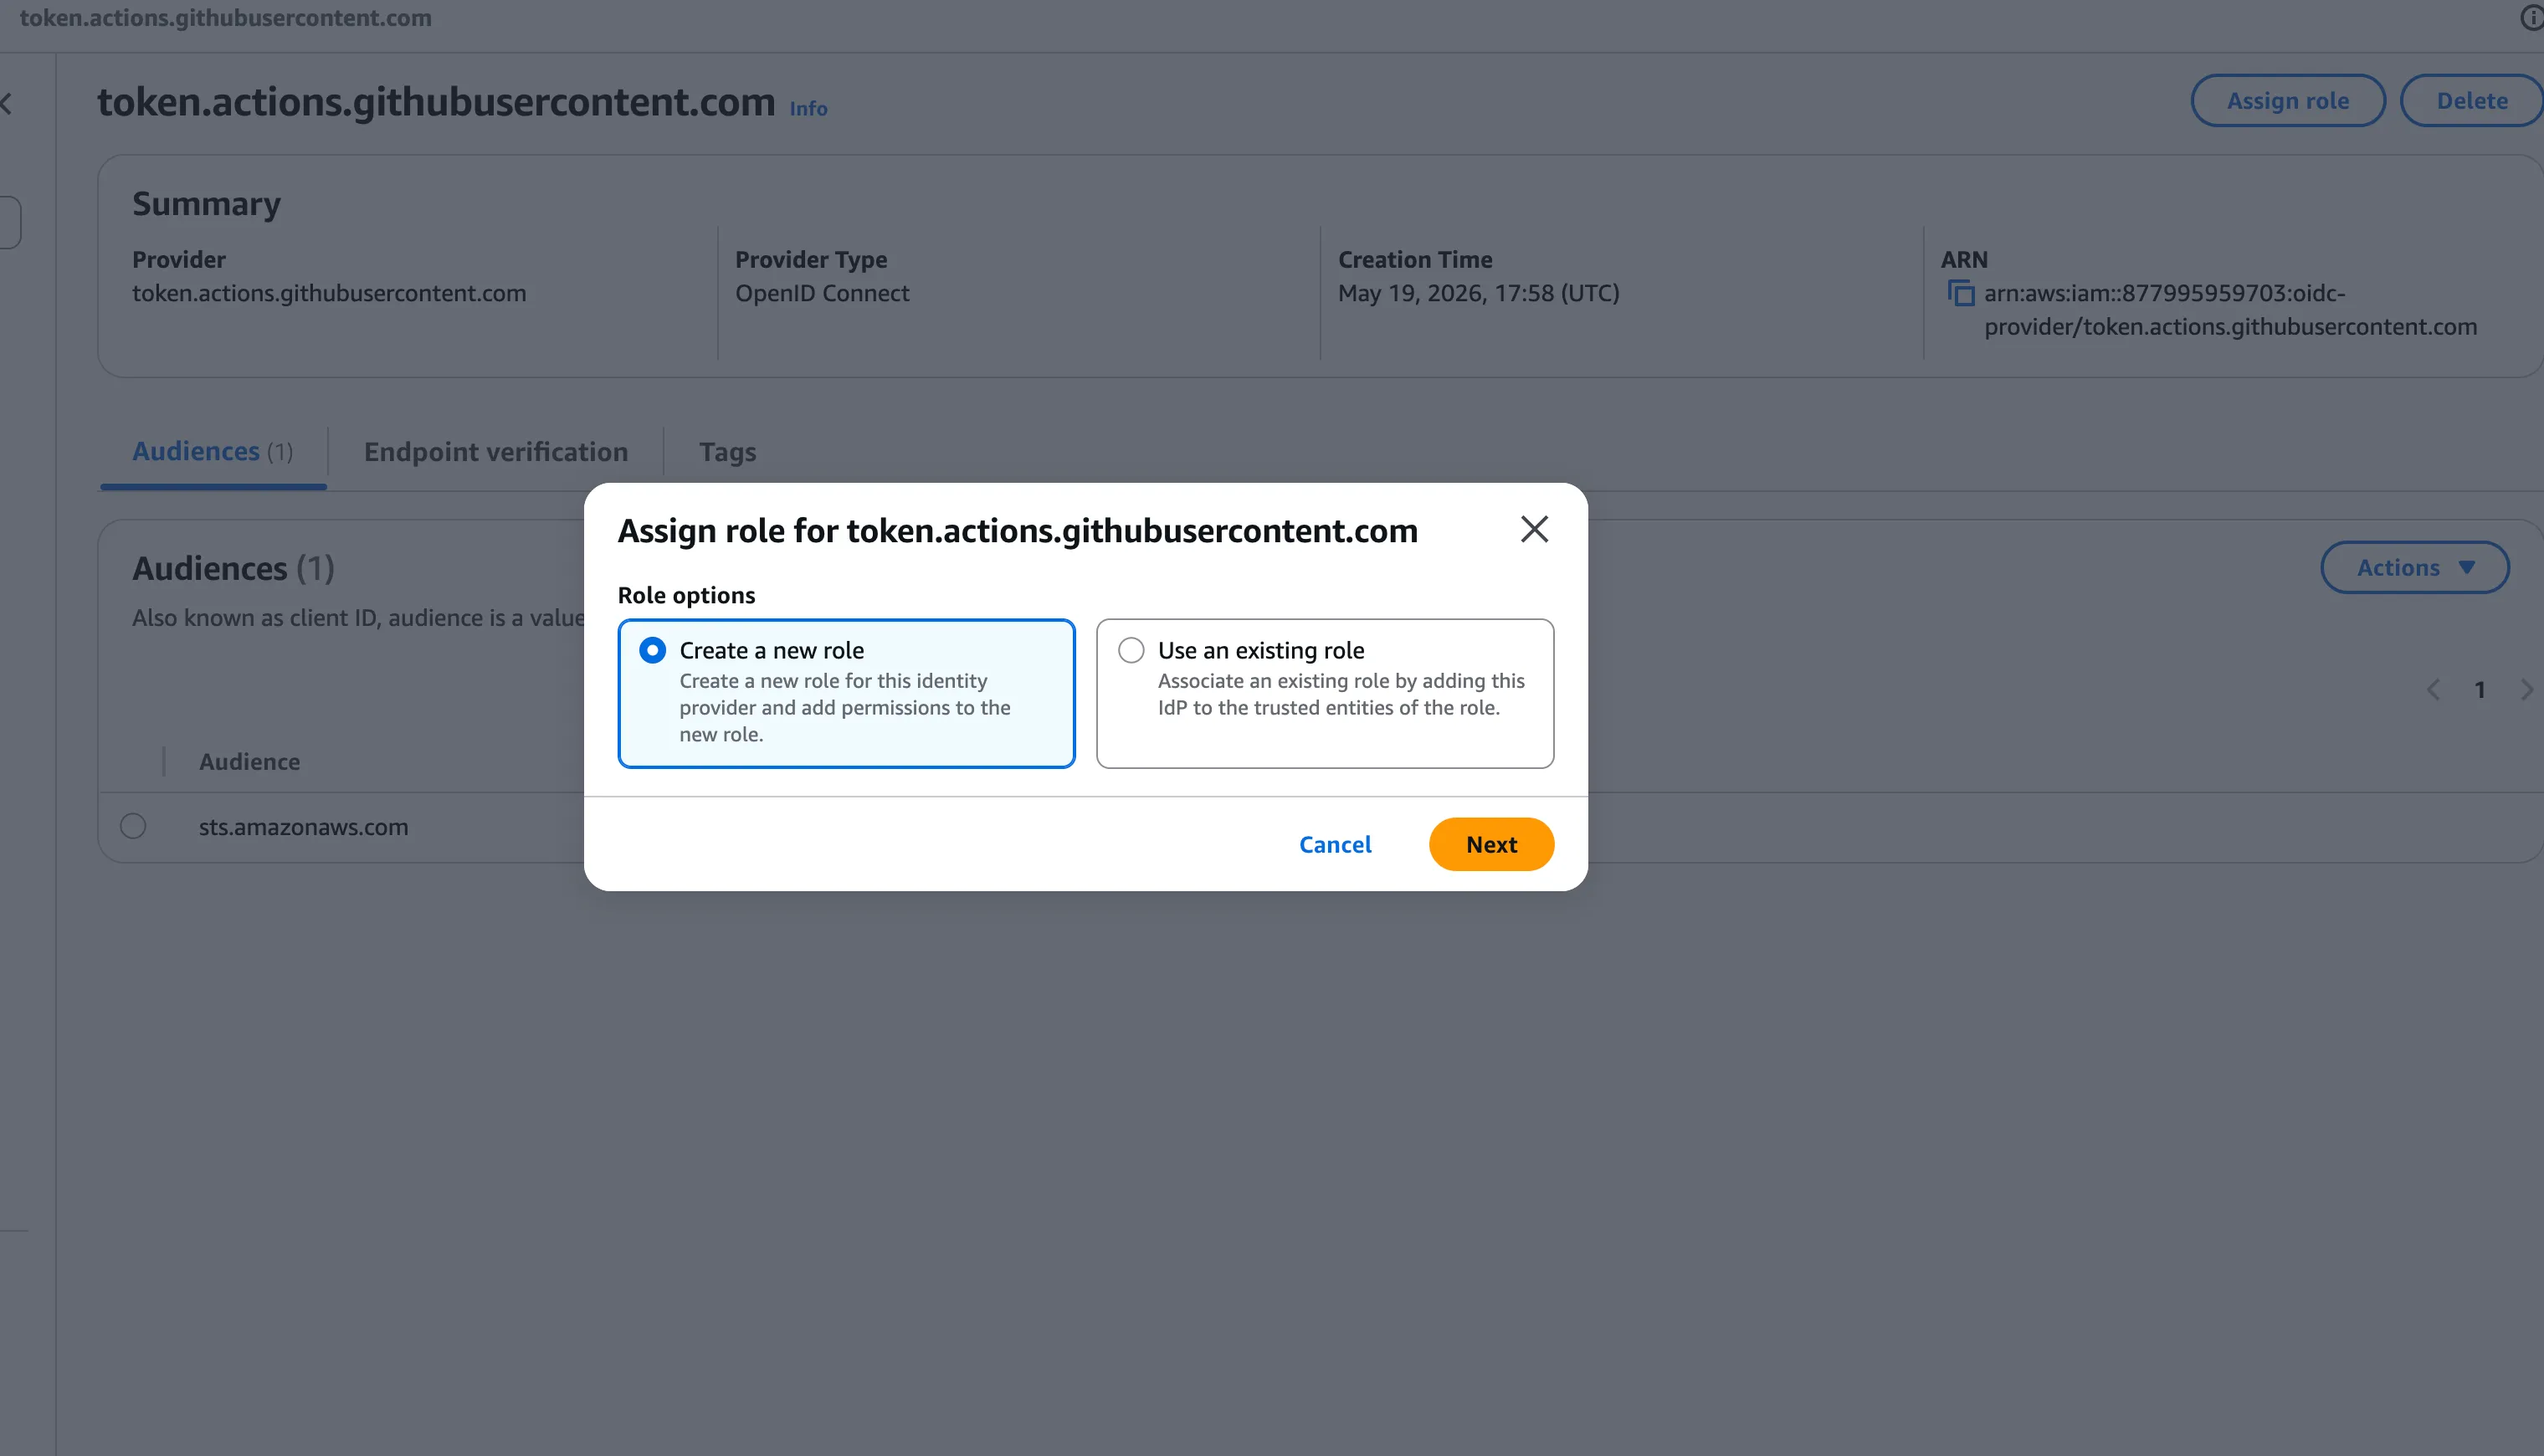
- Create an identity provider
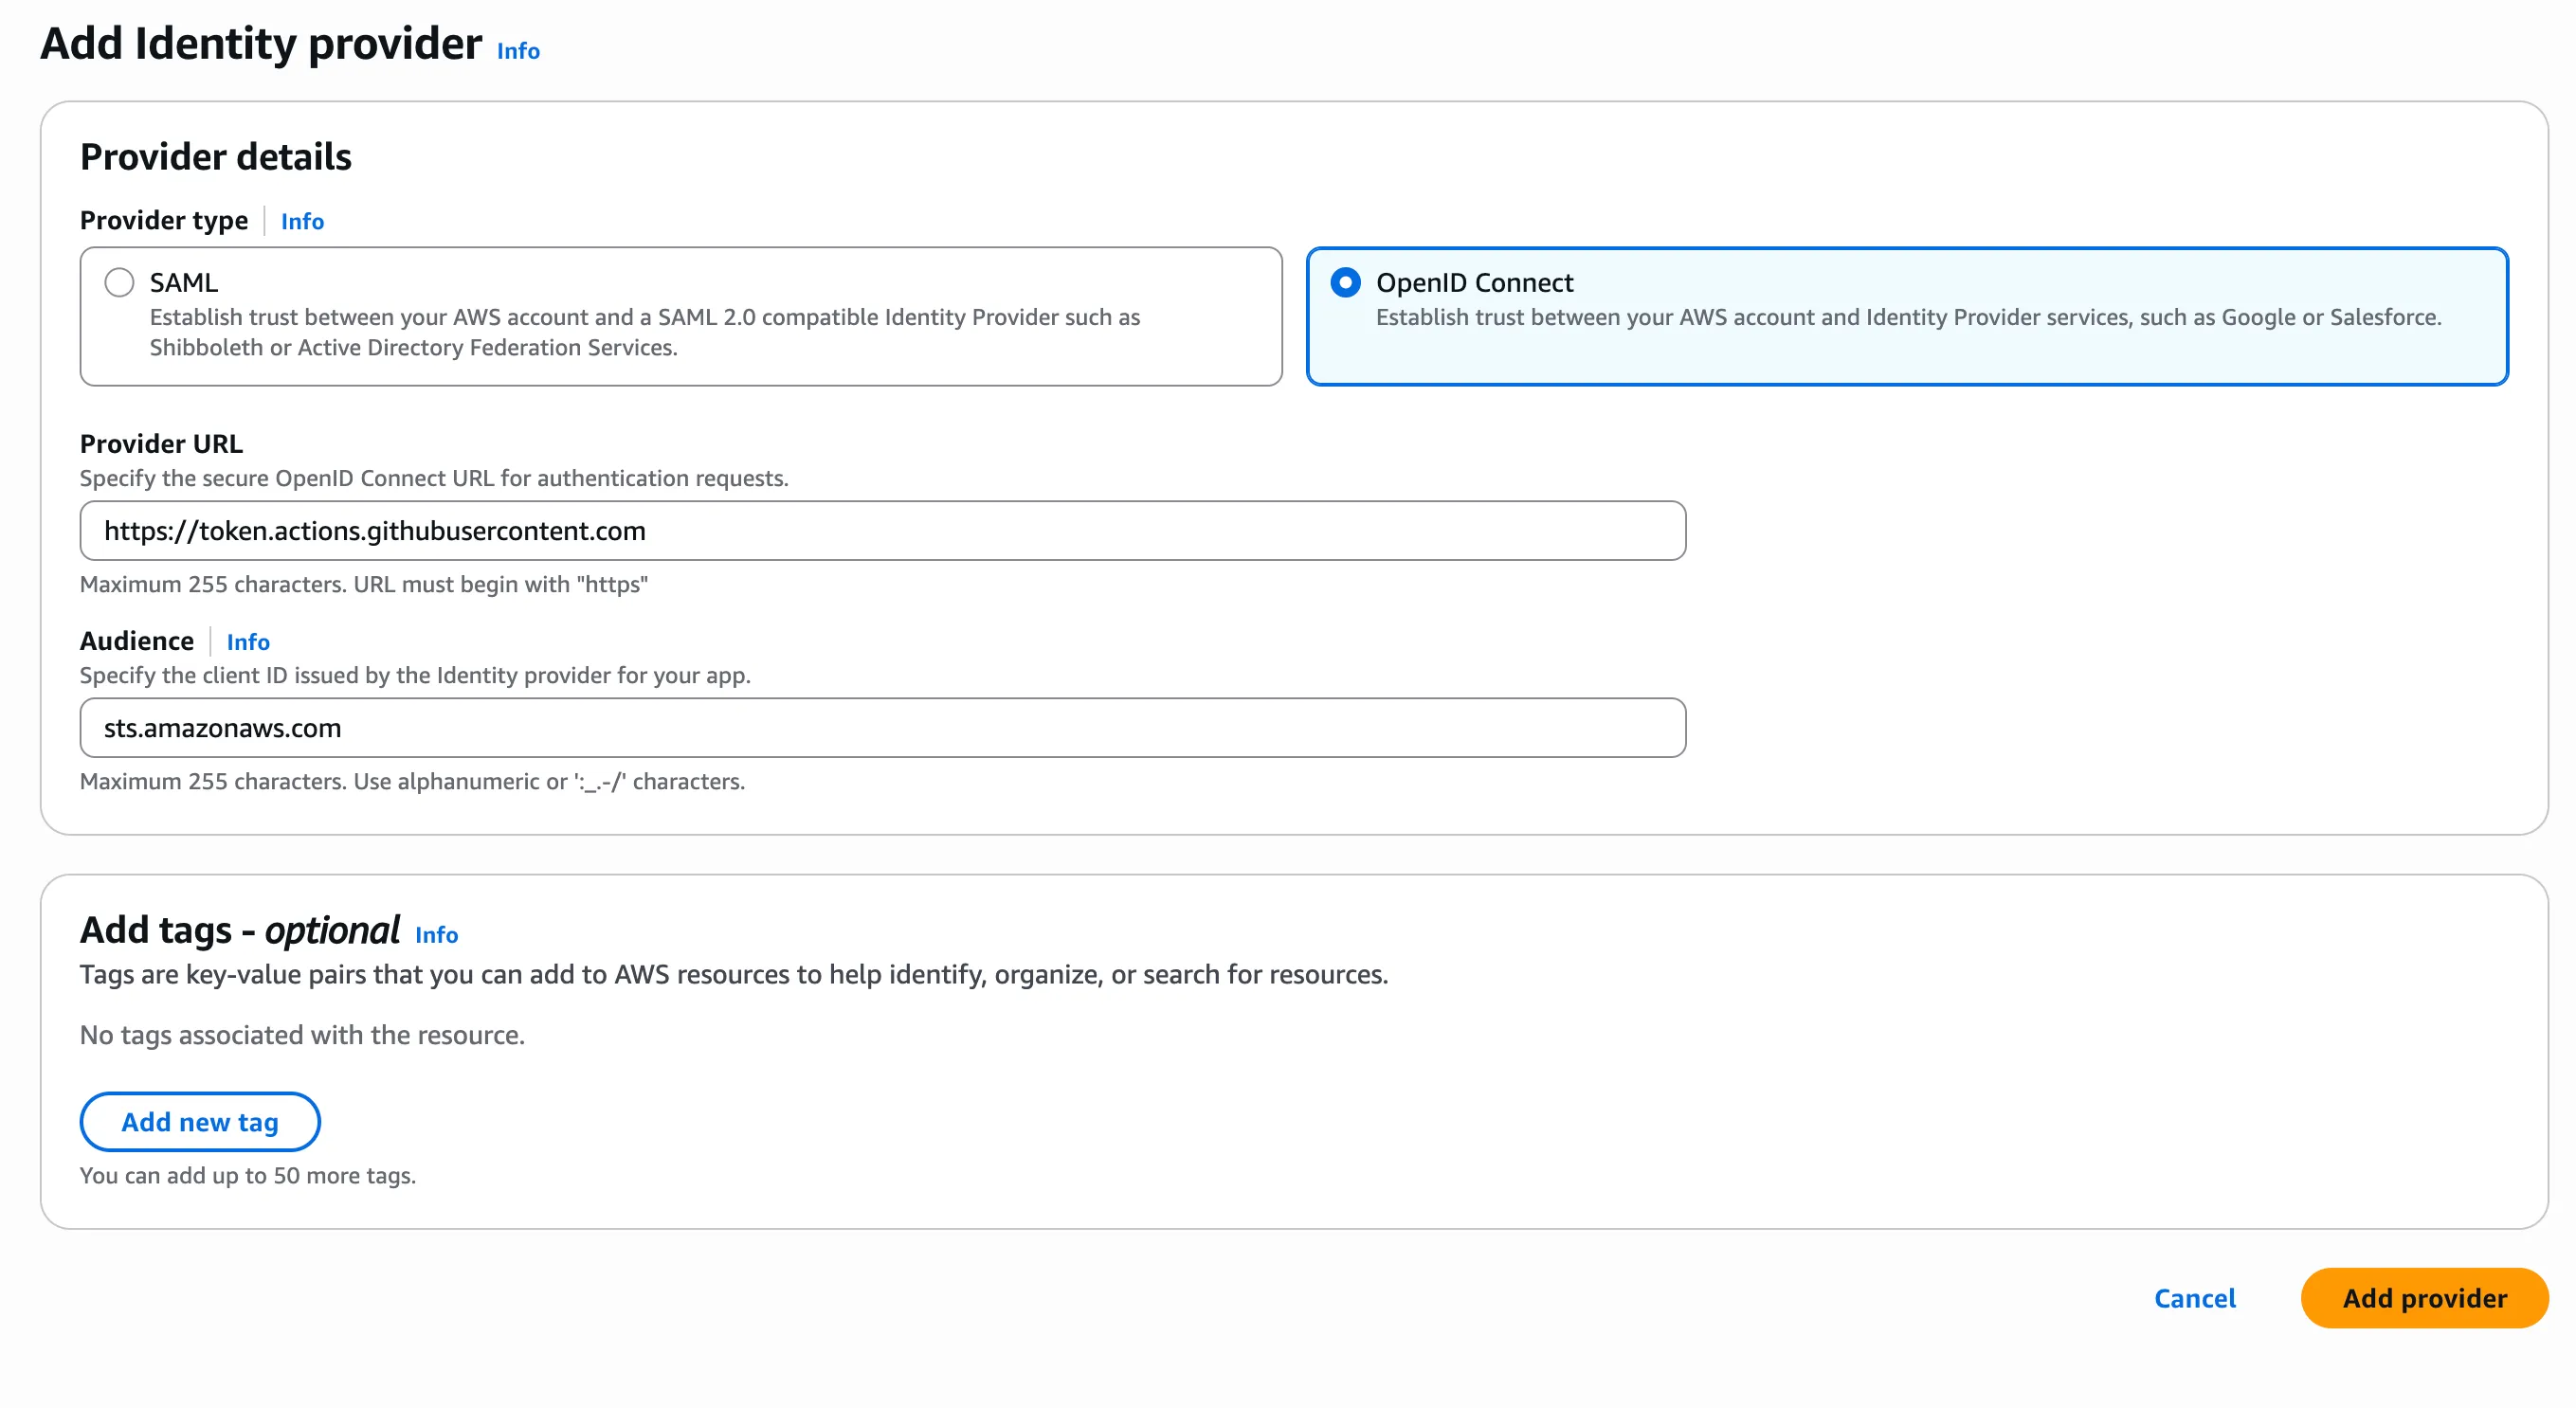 For the provider URL, use
 https://token.actions.githubusercontent.com.
For the audience, usests.amazonaws.com.
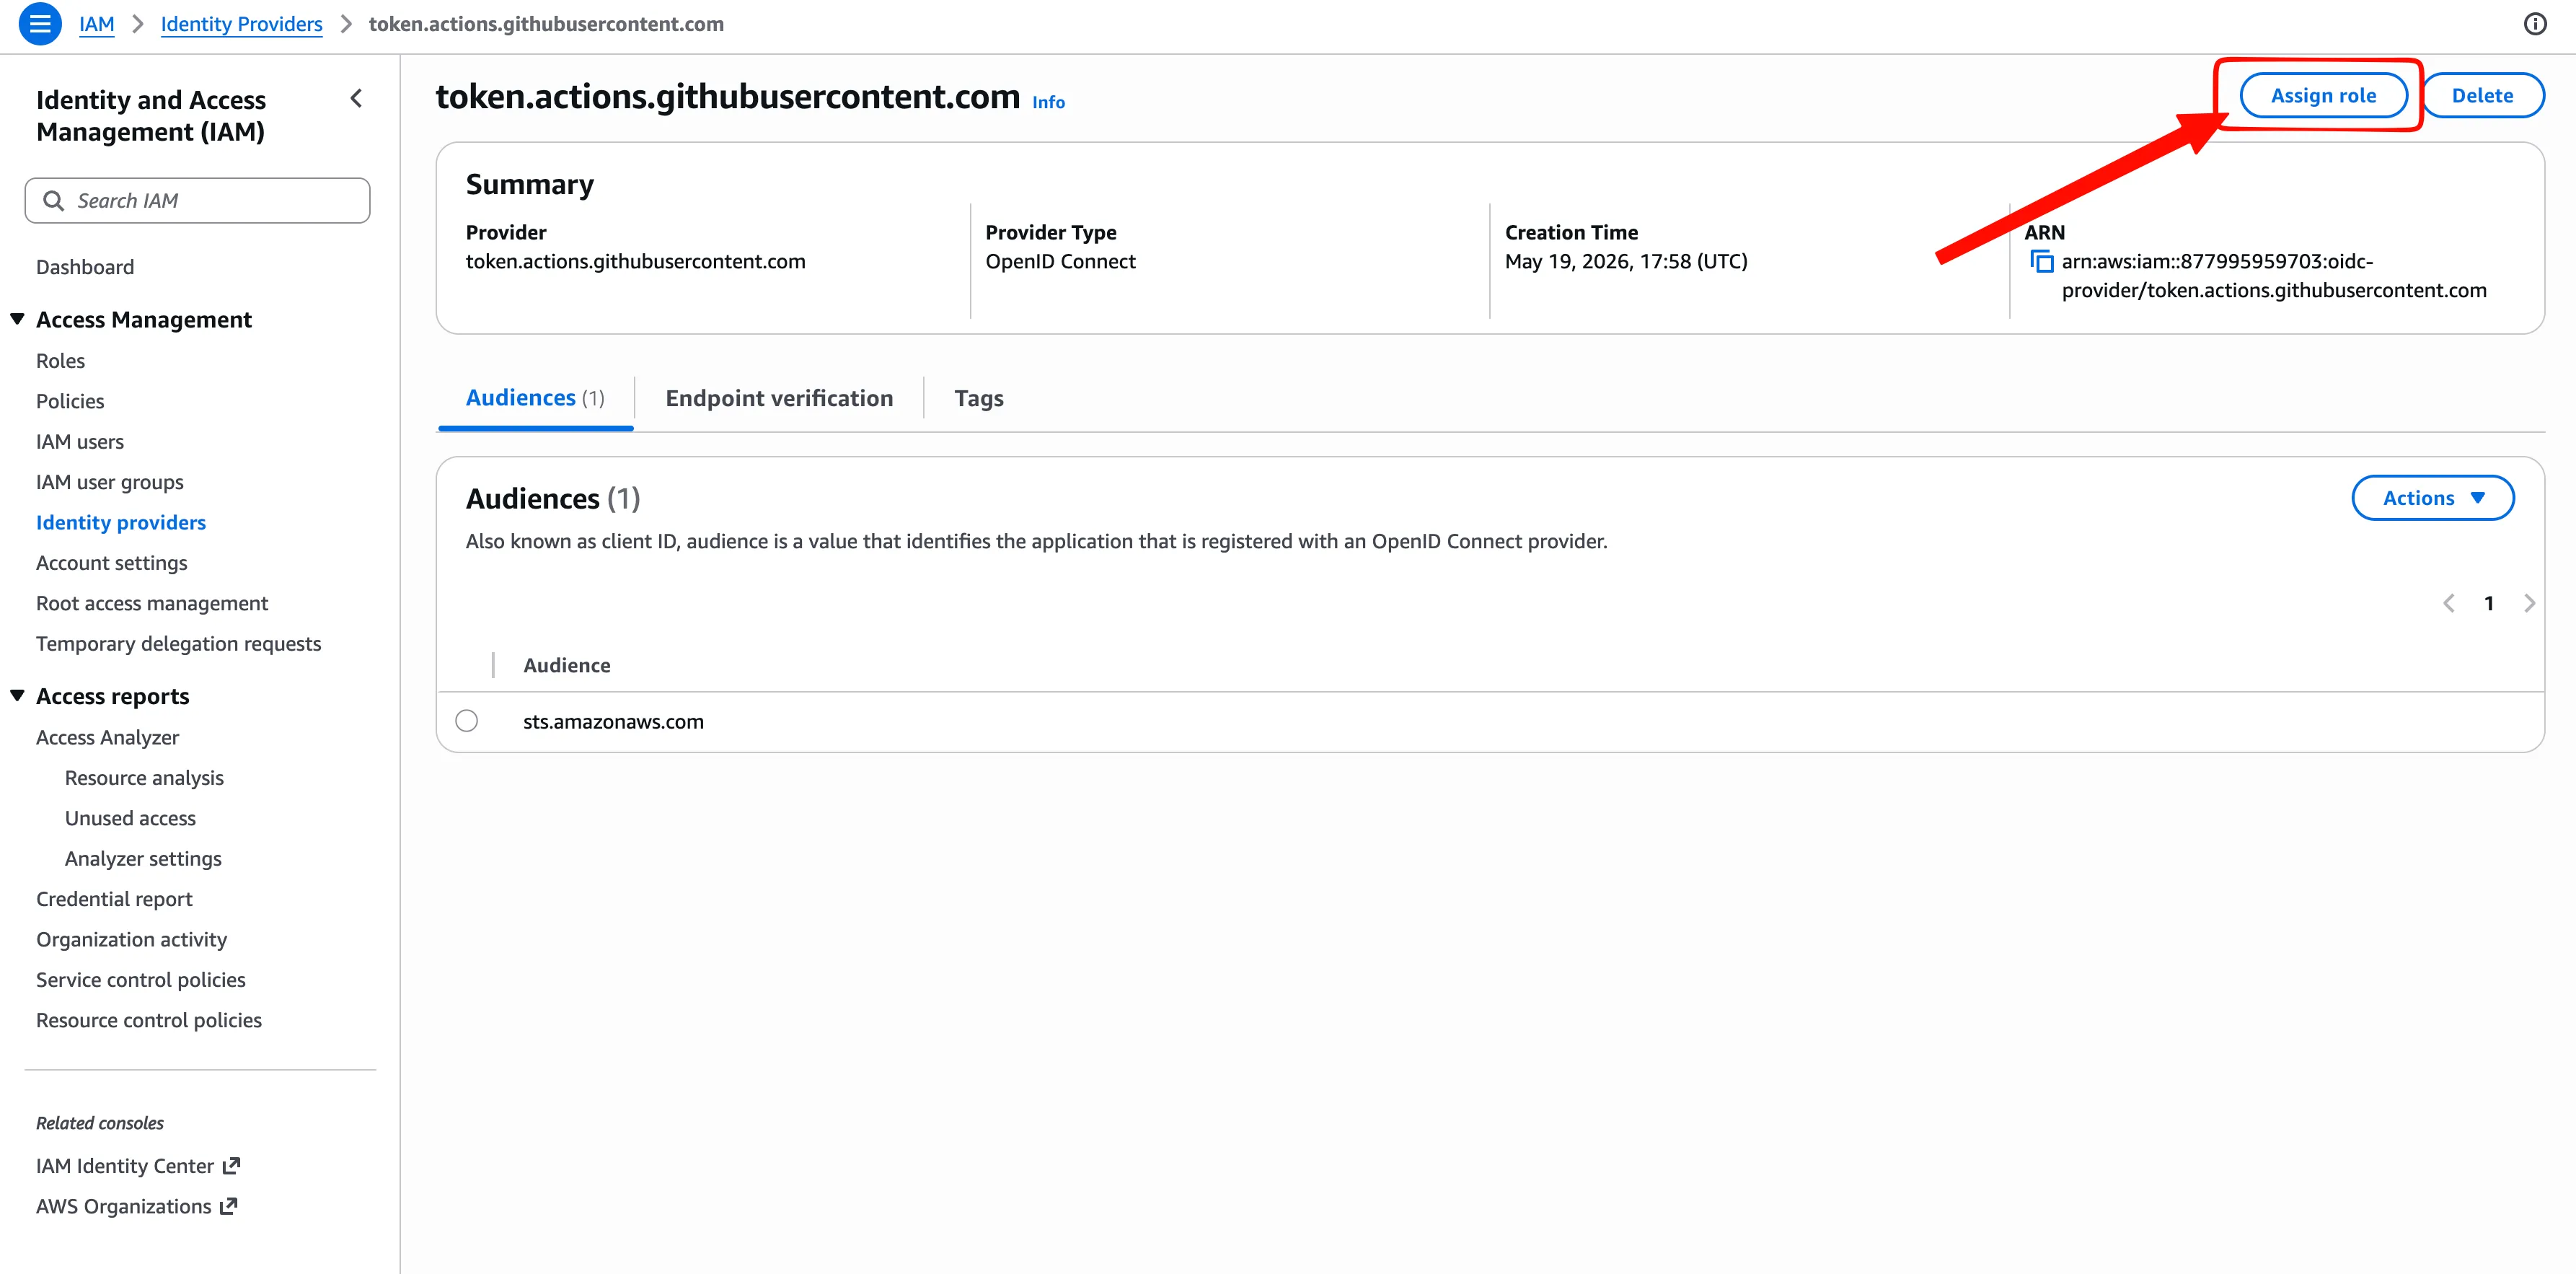
-
After creating an identity provider, assign a new role
-
Create a new role
-
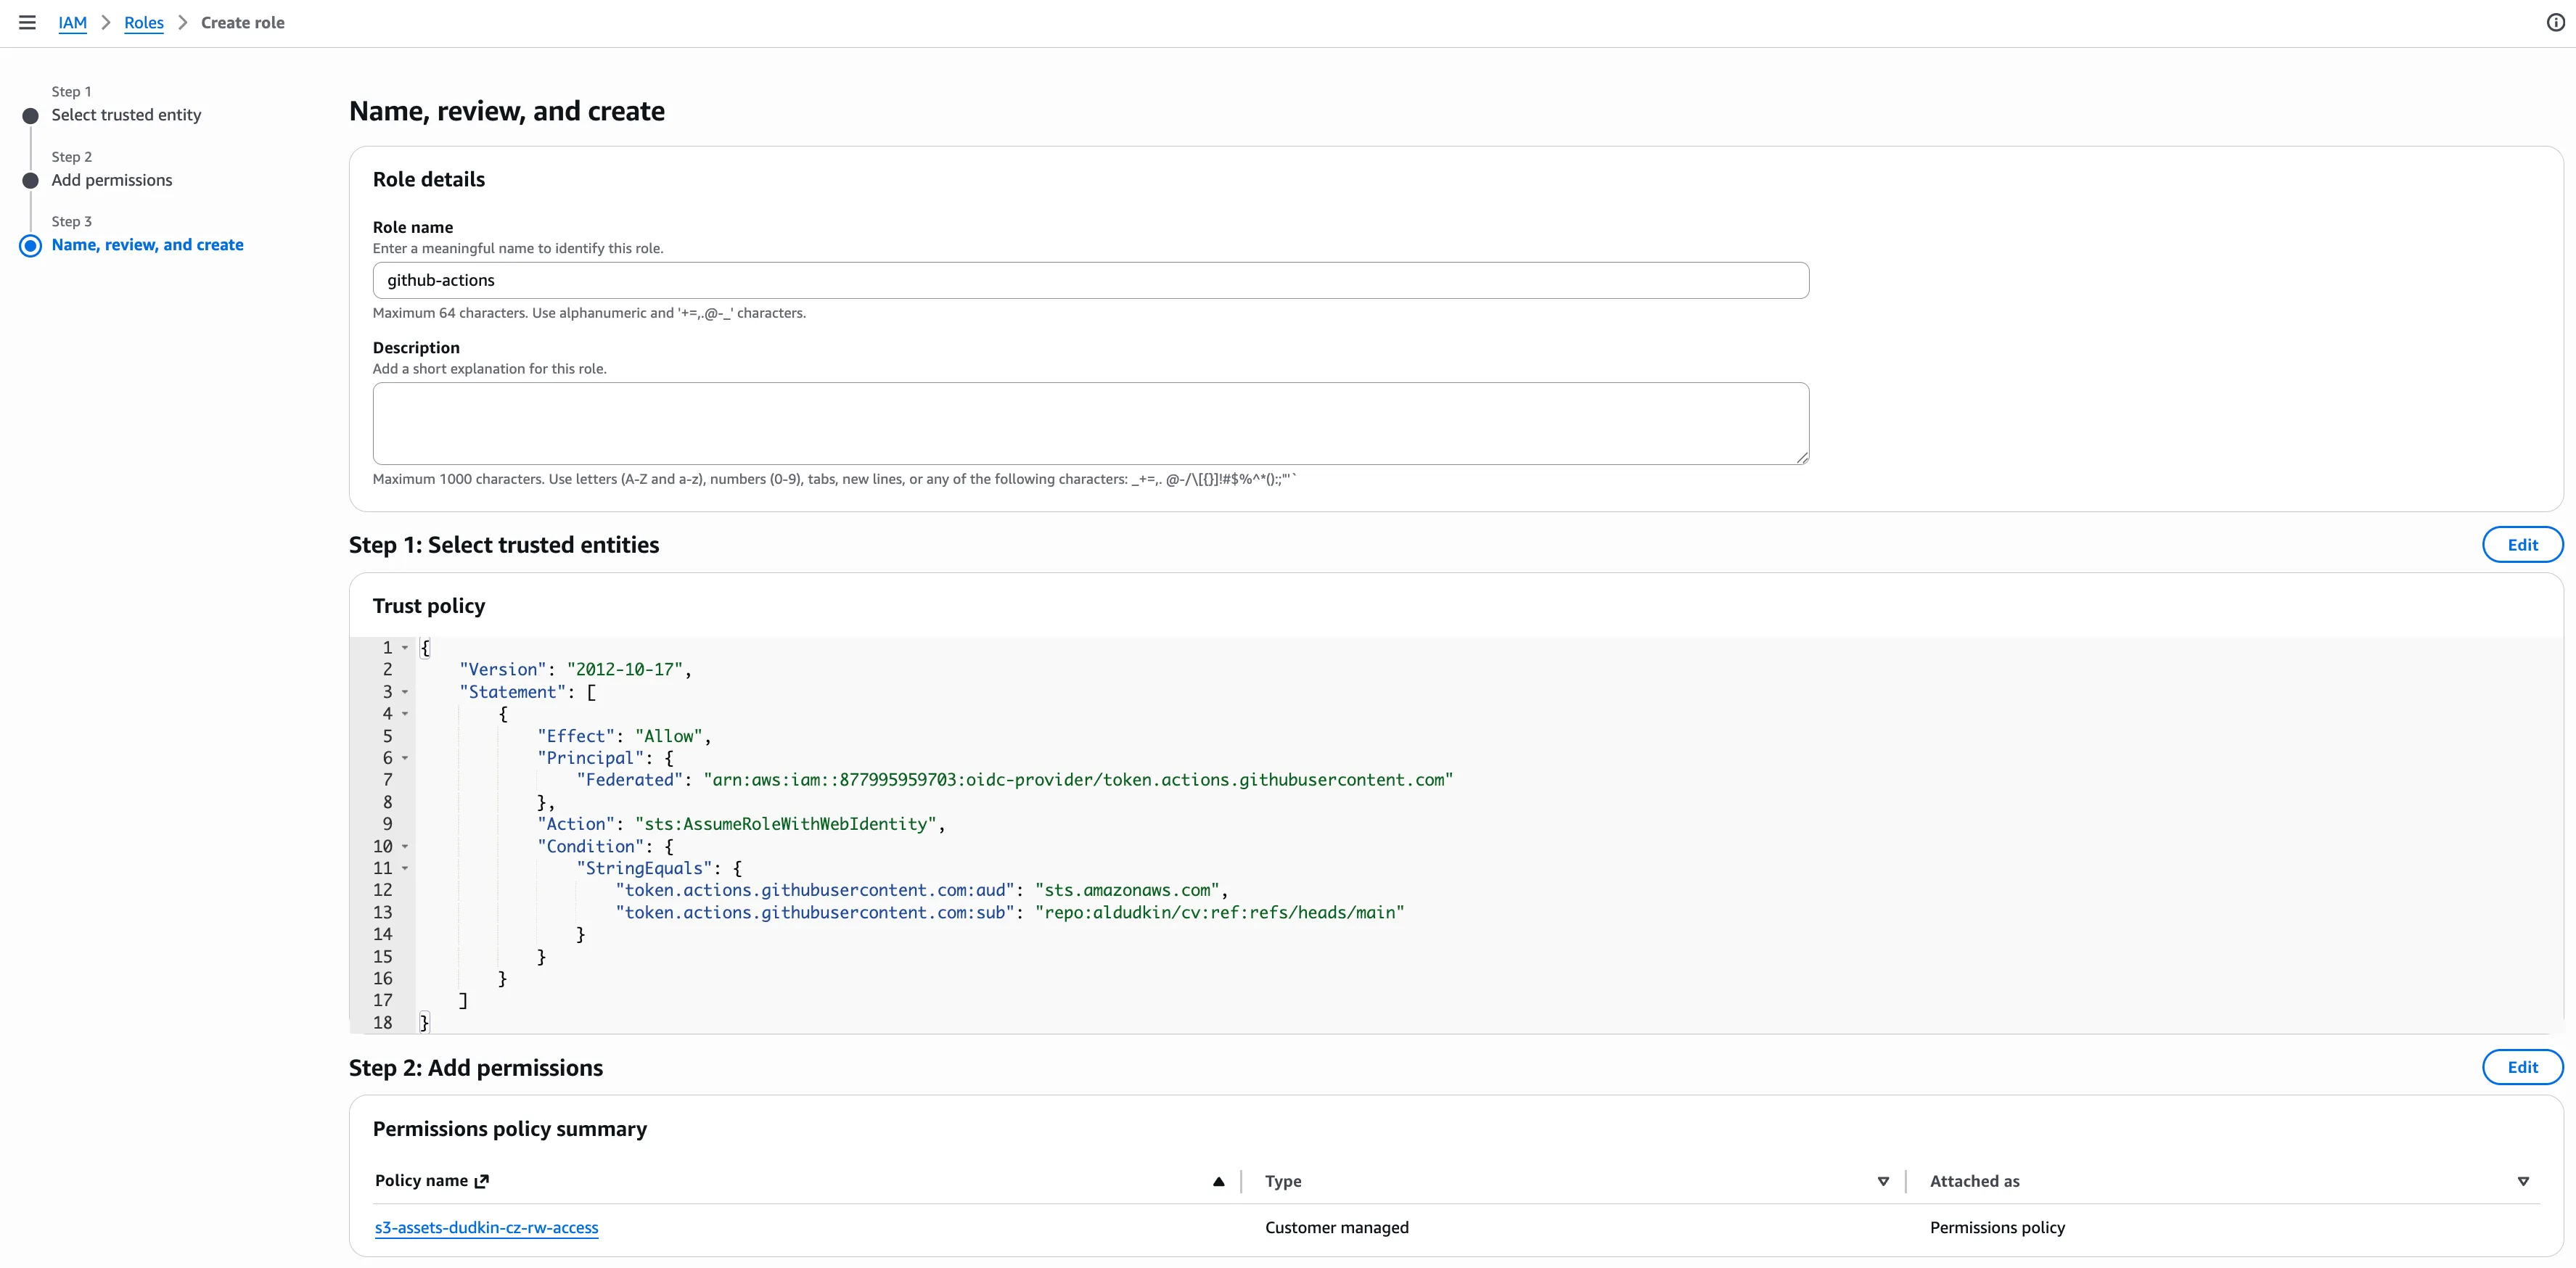
Specify a custom trust policy
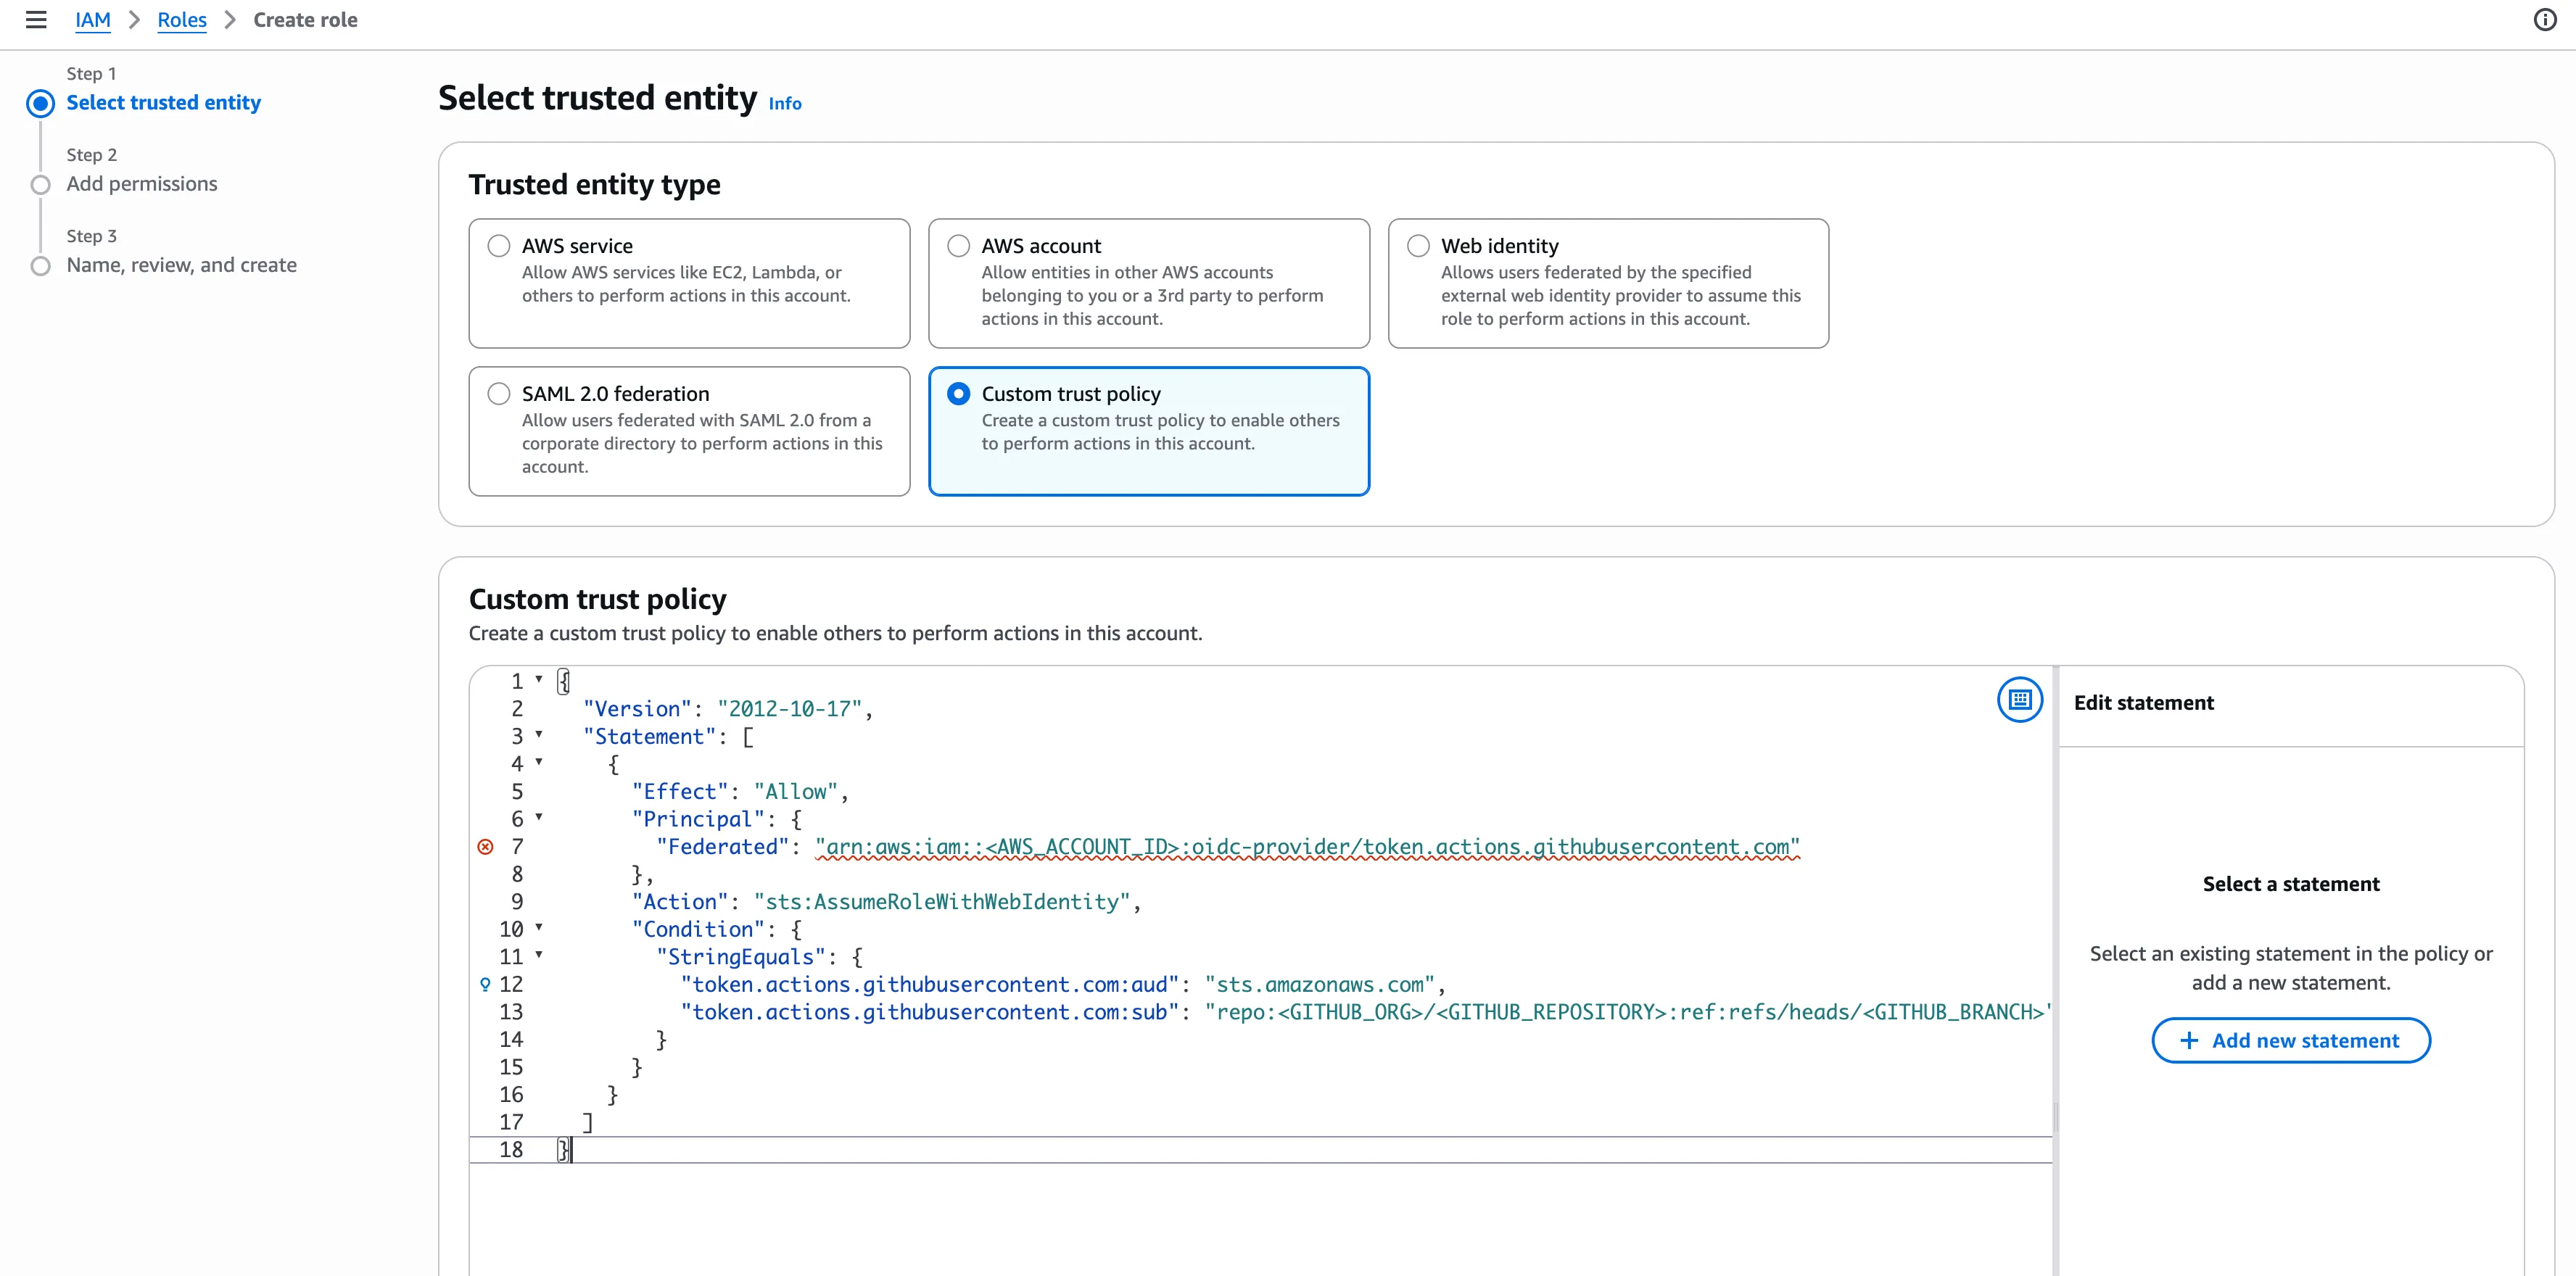
{
  "Version": "2012-10-17",
  "Statement": [
    {
      "Effect": "Allow",
      "Principal": {
        "Federated": "arn:aws:iam::<AWS_ACCOUNT_ID>:oidc-provider/token.actions.githubusercontent.com"
      },
      "Action": "sts:AssumeRoleWithWebIdentity",
      "Condition": {
        "StringEquals": {
          "token.actions.githubusercontent.com:aud": "sts.amazonaws.com",
          "token.actions.githubusercontent.com:sub": "repo:<GITHUB_ORG>/<GITHUB_REPOSITORY>:ref:refs/heads/<GITHUB_BRANCH>"
        }
      }
    }
  ]
}- Attach permissions to the IAM role that allow it to access the AWS resources you need.
Define a GitHub Actions pipeline
- Define the S3 bucket name as a repository variable
gh variable set S3_BUCKET --body "YOUR-BUCKET-NAME" --repo YOUR-ORG/YOUR-REPO- Create
.github/workflows/build.ymlinside your Git repository. You can use a LaTeX pipeline as an example (the same pattern works for any binary: compiled assets, images, binaries, etc.):
name: Build CV

on:
  push:
    branches: [main]
    paths:
      - '**.tex'
      - '**.cls'
      - '**.sty'
  pull_request:
    branches: [main]
    paths:
      - '**.tex'
      - '**.cls'
      - '**.sty'
  workflow_dispatch:

jobs:
  build:
    runs-on: ubuntu-latest
    permissions:
      id-token: write   # Required for OIDC authentication with AWS
      contents: read    # Required to check out the repository

    steps:
      - uses: actions/checkout@v4

      - name: Install TeX Live
        uses: zauguin/install-texlive@v3
        with:
          packages: |
            scheme-small
            titlesec
            xcharter
            fontawesome5
            simpleicons

      - name: Find TeX Live binary path
        id: texlive
        run: |
          TEXLIVE_BIN=$(find "$HOME/texlive/bin" -name xelatex -type f -o -name xelatex -type l 2>/dev/null | head -1 | xargs dirname)
          echo "bin=$TEXLIVE_BIN" >> "$GITHUB_OUTPUT"

      - name: Build PDF
        run: |
          export PATH="${{ steps.texlive.outputs.bin }}:$PATH"
          xelatex -interaction=nonstopmode cv_aleksandr_dudkin.tex
          xelatex -interaction=nonstopmode cv_aleksandr_dudkin.tex

      - name: Configure AWS Credentials
        uses: aws-actions/configure-aws-credentials@v4
        with:
          role-to-assume: YOUR-ROLE-ARN-HERE
          aws-region: YOUR-REGION-HERE
          audience: sts.amazonaws.com  # Explicit OIDC configuration

      - name: Upload PDF to S3
        run: |
          aws s3 cp YOUR-BINARY-FILE \
            s3://${S3_BUCKET}/YOUR-BINARY-FILE \
            --content-type application/pdf \
            --cache-control "max-age=3600"
        env:
          S3_BUCKET: ${{ vars.S3_BUCKET }}
The three critical pieces for AWS integration are the id-token: write permission, the aws-actions/configure-aws-credentials@v4 step with your role ARN, and the aws s3 cp command that uploads the built file using the repository variable for the bucket name.
Once pushed, every change to your source files triggers a new build and deploys the updated binary to S3 — no more committing PDFs, images, or compiled assets to Git.
Finally, you can use CloudFront to distribute your binaries publicly
For example, try including:
<a href="https://YOUR_CLOUDFRONT_DISTRO_LINK/FILE_NAME" download>click me</a>in your HTML source code.